Don’t you hate it when people write about an experience as if they have had it, when they haven’t? OK, that was me last month, but I got religion in recent weeks.
Last month I wrote a blog post on how to fine tune your Alaska Piks to your thumb. This month I broke a thumb nail, but I was obliged to play kalimba anyway… Let’s just say I now have a whole lot more useful information on using Alaska Piks with the kalimba. And lots of illustrations!
So, if you want the skinny on how to REALLY use Alaska Piks on your kalimba, karimba, or mbira, proceed!
1) We sell Alaska Piks, made of PVC plastic, in three different sizes, but those sizes are referenced to fingers, not thumbs. So you have think a bit larger than the actual given size. 2) You slide your thumb nail through the larger slot in the Pik, and the Pik end goes over your thumb flesh, but under your nail, which means that you need a bit of nail somewhere to keep the Pik secure while playing. 3) You can shape your Pik to optimize the connections to your thumb and to your kalimba. This article only deals with shaping the Pik to meet the kalimba; there is more about shaping the Piks to your thumb in the recent Alaska Pik blog post, see link at bottom of this page. 4) Almost everything you can learn from me about shaping the Alaska Pik is also applicable to shaping your natural thumb nails.
I was recently recording the music for the download “33 Intermediate Songs for the 17-Note Kalimba” and I broke my left thumb nail. So I got out an Alaska Pik for my left thumb, but decided that for the recording, I would get a more even sound if both thumbs had Piks.
If your Piks are working great for you, you probably don’t need to do anything. But if you are having problems with your Alaska Piks and the way they play on the kalimba, this info is for you.
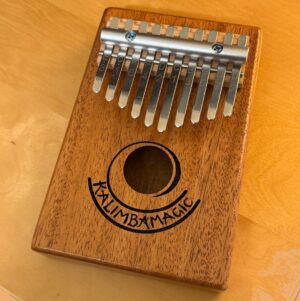
The Alto kalimba has always been a favorite of mine for many reasons, and one big one is that the tines are far enough apart to facilitate playing well. On the 17-note instruments (unless the tines are spread out in different levels like the African Karimba or the Lotus) the tines are noticeably closer together. And the closer tines are to each other, the more difficult it is to play them accurately. It is easier to play the wrong tine, and it is easier to pluck two tines when you’re only trying to play one.
The good news is that adjacent tines harmonize, so if you nick the tine adjacent to the one you were aiming for, it still sounds sweet, right? But the bottom line is that real precision playing becomes more difficult on the Treble and 17-Note kalimbas.
And here is the real lesson – if you are experiencing a problem playing the kalimba, pay careful attention to the nature of that problem. The problem probably points to a solution.
Case in point: As I played the 17-Note kalimba with my big bold Alaska Piks, I was often hitting two notes when I intended to play just one. But as I zoomed in with my focus, I realized that the extra notes I didn’t want were always higher than the intended note, and never lower. Ah! Not only were my thumb piks too wide for the kalimba I was playing, but I could also see which way to shape the Piks – I needed to shave a bit off the outside edge (ie, the left edge of the left Pik or the right edge of the right Pik). “Outside edge” is referenced to the outside of the kalimba, as opposed to the center of the kalimba.
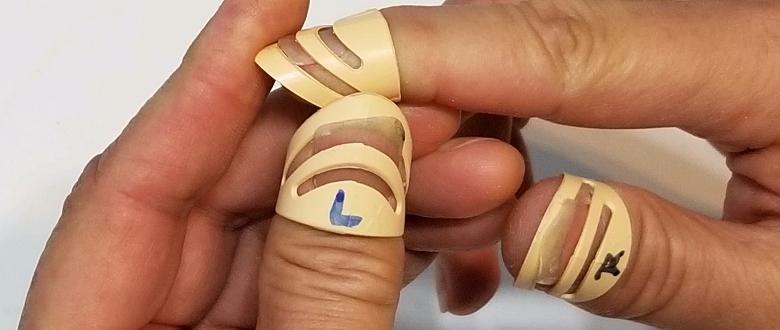
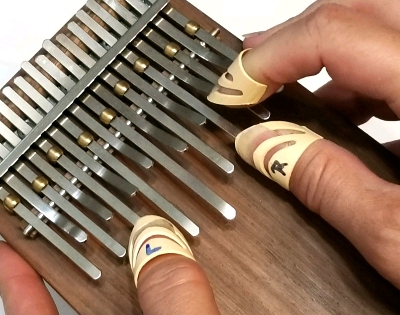
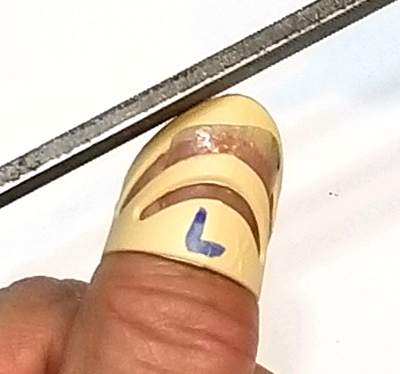 Two exciting results: after removing only a tiny bit from the outside edge of the Pik with a file, my Pik no longer clipped the adjacent higher tines, and I instantly had a much cleaner playing style. And while new Piks are all alike and can fit on either thumb, as soon as I filed them asymmetrically, I needed to keep track of which one was which… so I got my Sharpie marker and marked them, “L” and “R.” (Next time, to be truly cool, I will put those markings on the inside of the Pik so it doesn’t look as if I need signs to tell my left hand from my right.)
Which brings me to the story of one confused customer. Now, the Alaska Piks come in different sizes: medium (M), large (L), and extra large (XL), and each PVC Pik has a raised letter indicating its size. (We don’t sell small, which fit children’s fingers… but not children’s thumbs.) This customer bought and then returned a pair of large (“L”) Piks, because they couldn’t find the “R” Pik and thought they’d gotten two left-thumb Piks! (Ah, the only “R” you will find on the Piks are the Sharpie marks on your right thumb Pik after you start filing bits of the Piks to fit your thumbs or playing style.)
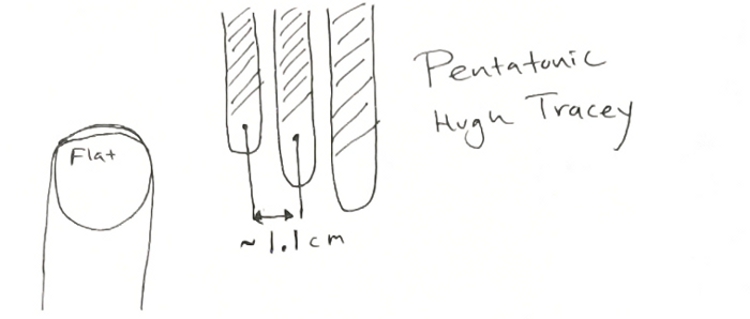
If you have a Hugh Tracey Pentatonic kalimba, the distance between adjacent tine centers is about 1.1 centimeters (the largest inter-tine space on any instrument at Kalimba Magic). You will want thumb nails with a flatter (wider) tip shape, otherwise you will not be able to do a glissando. A pointier nail shape will sometimes get caught between tines, hanging you up and delaying you on the way to the next note. If you are using an Alaska Pik, you may want to file its tip slightly flatter.
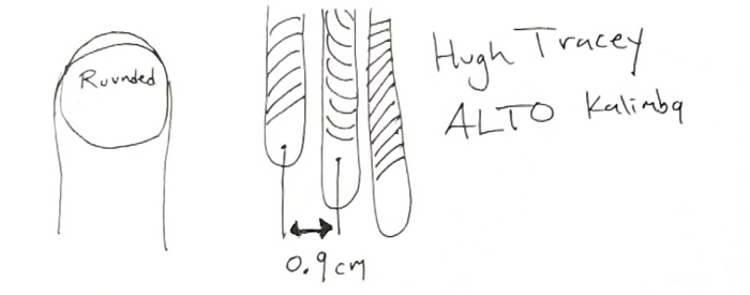
The Hugh Tracey Alto kalimba has a distance between adjacent tine centers of about 9 mm. If your thumb nail shape is flat, you will have a hard time picking out single tines to play. You still don’t want the nail too pointy, though, as it can get caught up between tines. I find the natural shape of the Alaska Pik to be fine for the Alto kalimba without adjusting.
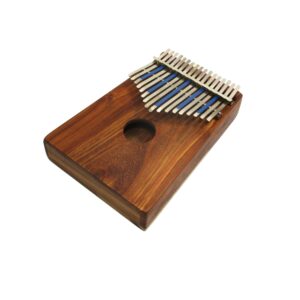
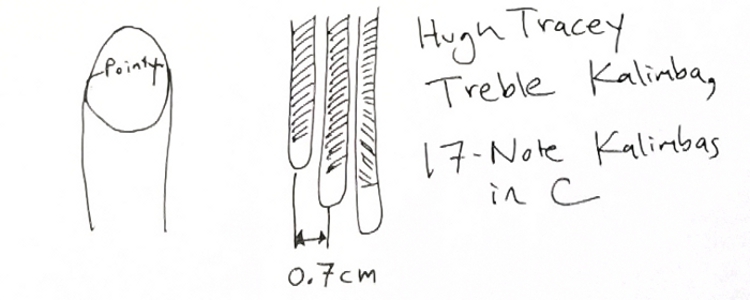 The new crop of 17-Note kalimbas from China, and the Hugh Tracey Treble kalimba upon which they are modeled, have a tine-center to tine-center distance of about 7 mm, and this kalimba requires the pointiest thumb nails to give you the precision to play individual notes. When I filed my Piks on the outside edge to make them more pointy, my playing improved instantly and considerably.
Of course you could adjust the length of the Piks. A main concern is that you want them to be longer than your thumb nails… which will not be an issue unless you cut a lot off the Pik or you have really long nails.
If you were to adjust the length, I would suggest you start with a good strong nail clipper or the larger toenail clippers, and cut very conservatively. After cutting, make micro adjustments with a hardware file or nail file.
But in general I don’t think you will need to adjust the length of your Alaska Piks. It is super easy to accommodate for nail length variation by just changing the way you hold the kalimba. If your nails are shorter, you will grasp the kalimba a bit closer to the tines. If your nails are a bit longer, you will grasp the kalimba a bit farther from the tines.
On the other hand – when I play a tine, I first touch it with my thumb flesh to deaden any existing vibrations. If you touch a vibrating tine with your thumb nail, you get a “ZZZT!” sound, After deadening any existing tine vibrations, I slide the nail or Pik down the tine and flick the tip of the tine. If the Piks are longer, there is a longer distance (and more time) between deadening sound with the thumb flesh and plucking with the nail or Pik. If that delay becomes a problem in your playing you should consider reducing the length of your nails or of the Alaska Piks.
I like medium-long natural thumb nails – 1/8 to 3/16 of an inch, or 3-5 mm. I find this length of nail gives me a great glissando and lots of fine control in playing. However, 1/4″ or longer nails can also give you a clicking sound when you pluck. Think about it – equal and opposite reactions and all – while your thumb nail is plucking the kalimba tine, the kalimba tine is also plucking your thumb nail! What’s more, a longer tine will produce clickier nail sounds, which really can be heard.
By angling your thumbs so their nails are pointing somewhat downward, the clicking will be quieter.
You can also diminish the clicking sound by stiffening your nails with nail products or superglue, but I find that playing with Alaska Piks removes the unpleasant clicking sound that you can get with longer natural nails.

Actually, you can also play the Alto, Treble, or 17-Note kalimbas with either of these three-Pik approaches, but it is instructive to see the traditional techniques on these instruments.
On the mbira, the left thumb plays both rows of wide tines (the thumb usually slides off an upper tine to a lower tine). The right thumb actually only plays three tines – the two it touches in the photo and the adjacent right tine. And the right index finger plucks upward to play all the other small tines on the right side.
For me, it is a pair of XL piks on my thumbs and an L Pik on the index finger. I cut a bit off the index finger’s Pik, in certain spots depending on the instrument being played, to make it more precise at plucking just one tine.
 The African-tuned Karimba – also known as the mbira nyunga nyunga or just as nyunga for short – also uses the two thumbs and the right index finger. On the karimba, the right index finger reaches up to the upper row of tines, and so it plucks “over the top” as opposed to from under the tine. You rotate your finger and thumb differently from the way you hold your hand for the mbira.
For the mbira, when looking at the pick on my outstretched hand, palm down, I cut from the right edge of my index finger’s Pik. When I flip my finger over and pluck from under the tines, this puts the contact region to the right side of my now-upside-down finger.
For the karimba, I removed material from the left side of the Pik (when looking at it on my outstretched hand, palm down) to improve playability. In other words, the exact opposite of what I did for the mbira.
I think you should read my words and gain from my experience, get some Piks, and pay attention as you play. Let your thumbs and your kalimba and your ears tell you about how you can adjust the Piks for optimal playing.
And if you don’t have Alaska Piks, you can apply almost everything here to the natural shape of your own nails.
If you do want to get Alaska Piks, you may want to get a different pair for each different kalimba type you have.
The video below shows me playing the Hugh Tracey Alto kalimba with an Alaska Pik on my left thumb. I had broken my left thumb nail (it did not hurt) a few days earlier. Three things to notice: can you hear any difference in sound between the left notes and the right notes? Can you detect any apparent difference in stiffness between the left and right? And, half way through the video, I add a second kalimba, and right before I started to play, I sensed that my Alaska Pik was not firmly in place. Just before playing, l quickly pushed it back with my fingers. You can actually hear something click in there. Again, no pain.
And that is one good reason to use the Alaska Piks that I haven’t mentioned – playing with the Piks eliminates the pain of plucking metal kalimba tines with the tips of your thumbs.

 Assist Paul Tracey Rebuild His House in Pacific Palisades
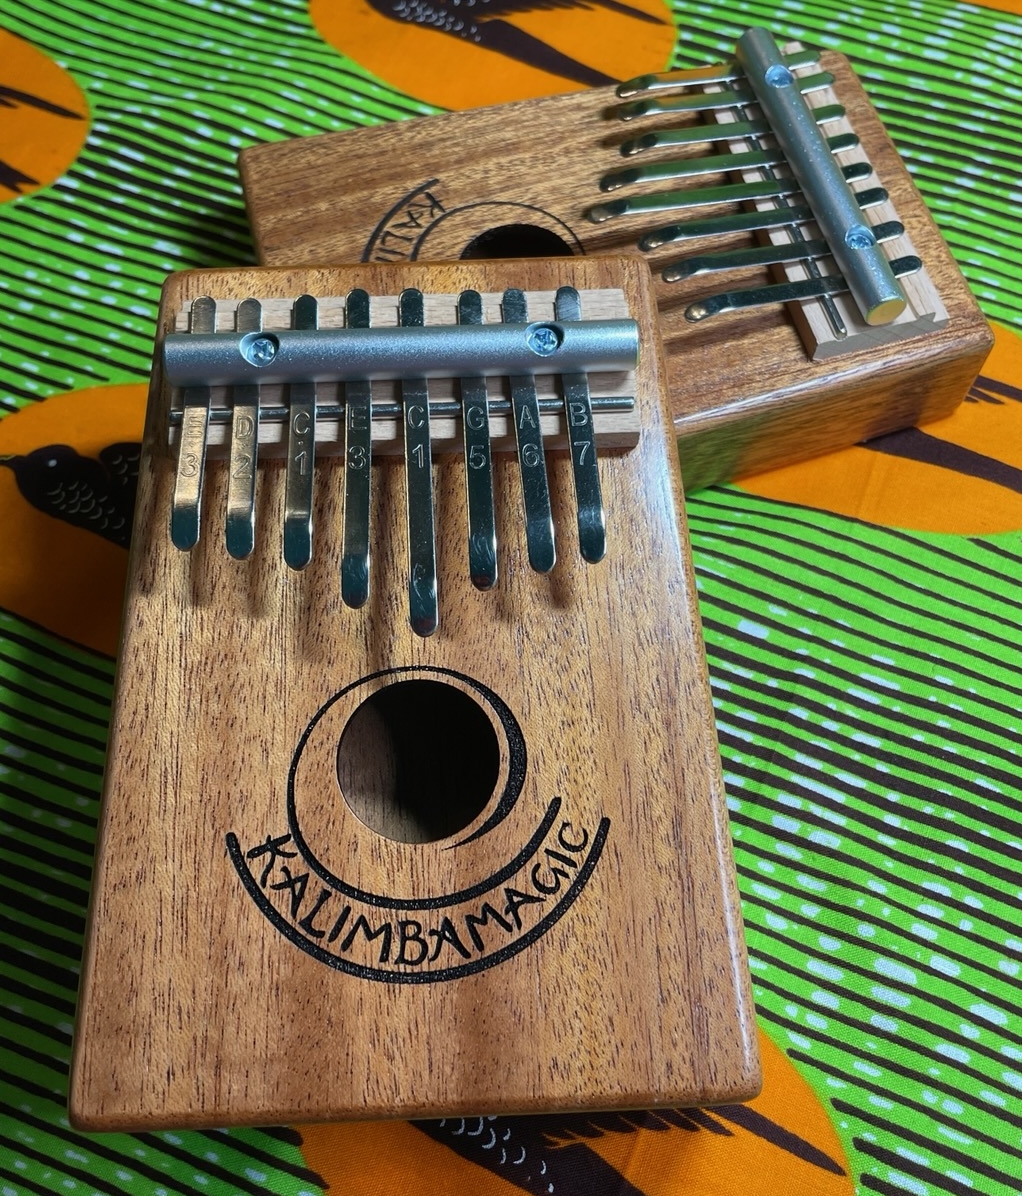 8-Note Spiral Kalimba Turned into a Student Karimba
 Seek to Infuse Your Musical Moments With Beauty and Magic