Here we present seven of the most basic building blocks of kalimba music. They are based on simple thumb routines which the body can easily remember. (This group is directly applicable to diatonic kalimbas, ones that cover the notes “Do Re Mi Fa So La Ti Do” in some scale.) Each of these routines can be applied in different ways to different tines, and this will produce different music based on the same sort of easy pattern.
For each of the seven basic moves, we give you a very short bit of tablature to illustrate the shape of the pattern, explain what the pattern is and why it is useful, and provide a recording to convey its sound. All that is left is for you to pick up your kalimba and reproduce these simple moves that will help unlock your potential as a kalimba player.
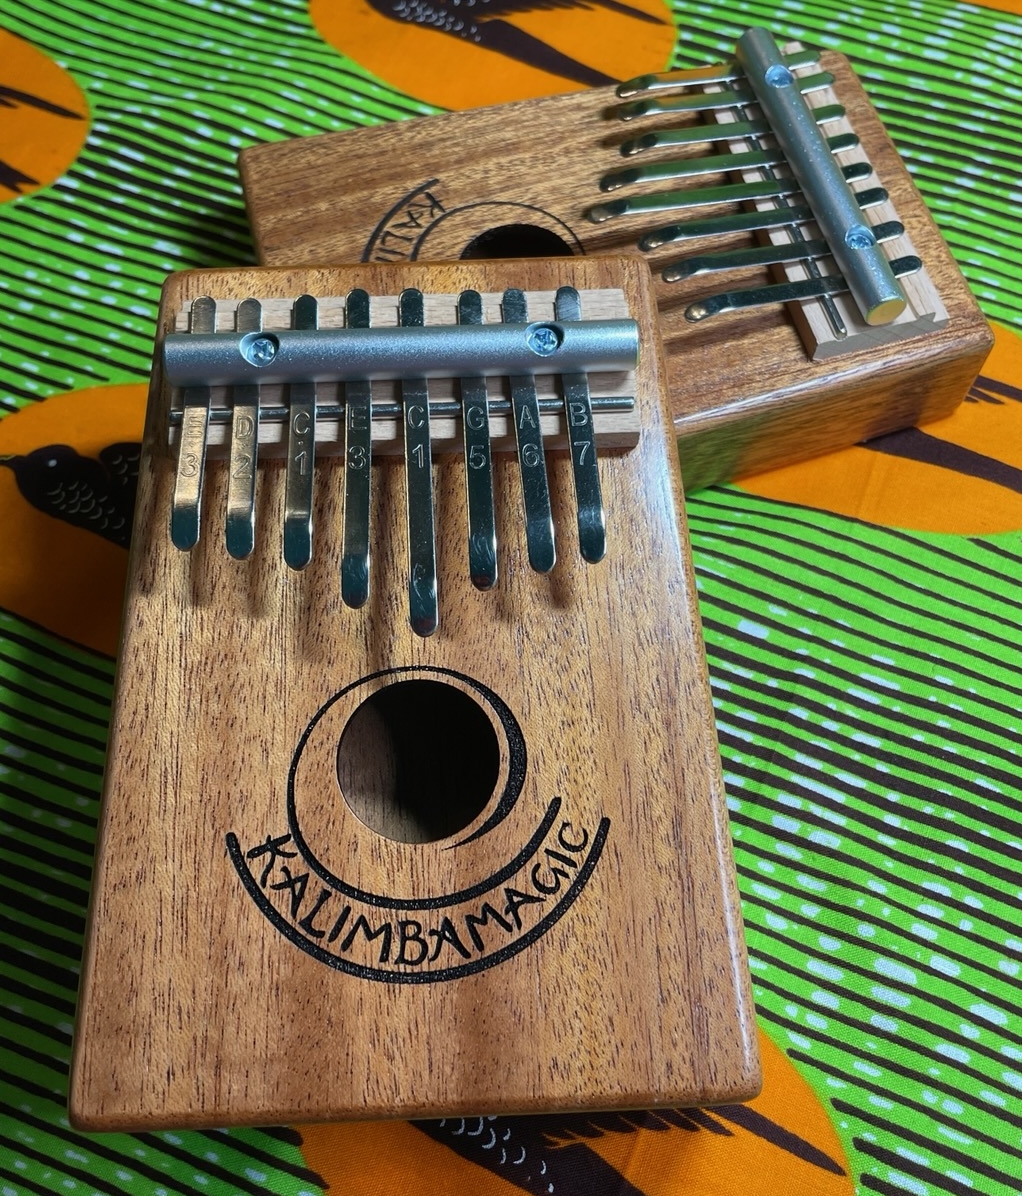
Diatonic kalimbas, in addition to covering the notes “Do Re Mi Fa So La Ti Do” in some scale, also possess an alternating note layout, and the tips of all the tines form a “V” that is easy to see. The center of the V contains all the lower notes, and the farther out from the center you go (to either the left or right), the higher the notes sound. I’ll call this a “regular” kalimba. Once you learn the basic routines discussed here, you can apply them to any regular kalimba.
Note that although the tablature presented here is for the Alto kalimba (Bb Treble and D Treble kalimbas can also read it), the general shapes of these moves can be translated to any regular kalimba with an alternating note layout.
Kalimbas with idiosyncratic note layouts such as the African Tuned karimba or the Lotus karimba are not exactly covered by these moves – or rather, you can perform them on these irregular kalimbas, but their meaning will be different. We’ll cover some basic moves for those atypical kalimbas at another time.
These routines are widely applicable: there will be zillions of different ways you can perform each of them. Make them your own: First learn them exactly, and then create your own versions. The possibilities are endless.
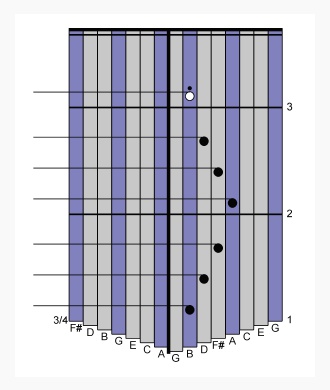
Playing adjacent notes on the same side results in 3rd intervals between the notes played. It is conceptually simple, very easy to accomplish, and it usually sounds very sweet. Let your hands take turns, doing this on one side, and then the other. If you are ever in a spot where you have no idea what to do next while you’re playing, try going to a pattern such as this one.
You will create different music if you are willing to jump over tines, as shown in this example. How far can you jump?
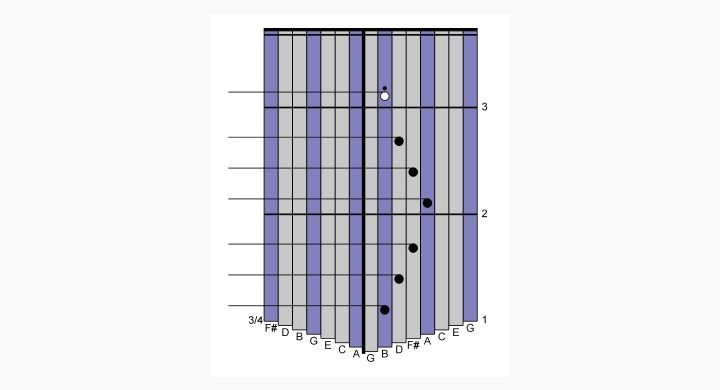
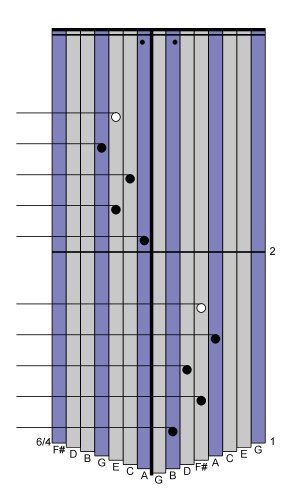
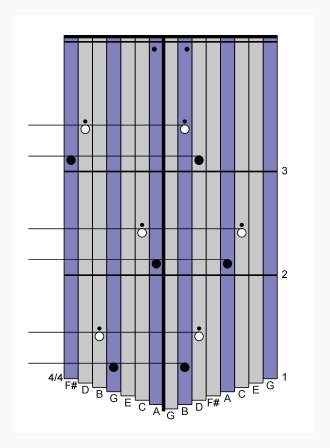
In this example, we mirror the pattern, first playing it on the right side, and then switching over to play the exact same pattern on the left side.
When the pattern is played on the left side, the notes are lower. The three painted tines on the right side – B, A, and G from center out – are one degree higher in the scale than the corresponding painted tines on the left side – A, G, and F#.
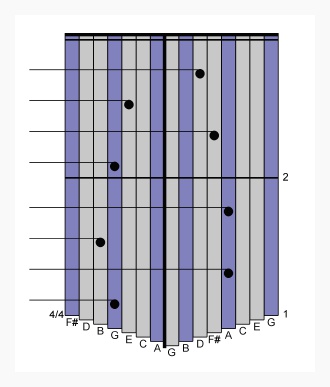
In order to play fast, you need to alternate sides, playing from left to right and back to left. This permits you to play twice as fast as you could play if you were just playing on the same side. Scales on the kalimba are played in the same fashion, by alternating sides. This is a great thing because scale segments are very common in music, and you can play them fast too! By the way, the painted tines can help you keep on track when switching sides. Once the first note (the painted G on the left) is played, and we want to go up the scale to the next note (A), we cross to the right side and go to the corresponding painted tine. If we wanted to go down the scale to F#, we would have gone to the right, but one tine below the corresponding painted tine.
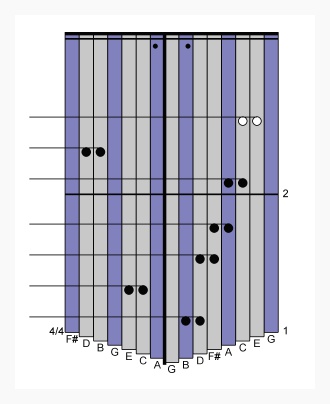
Being able to zigzag on the instrument to make scales or segments of scales is a crucial skill. I find non-scale alternating left-right patterns to be much more interesting. In this example, both left and right thumbs are making similar patterns, but the left thumb is playing much higher notes and the right thumb is playing lower ones. Of course, invent your own patterns along this line.
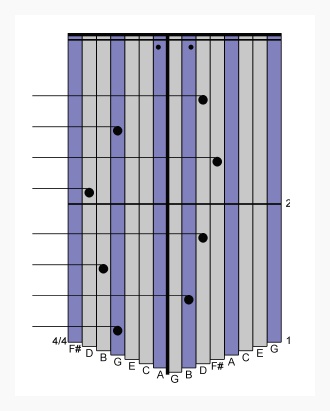
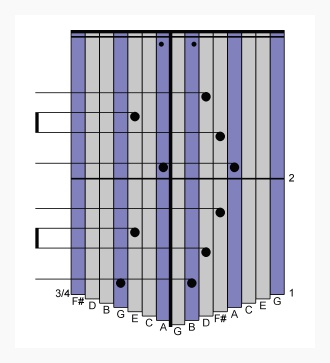
A great feature of the kalimba is that two-note harmonies are very easy to play. In looking at the tablature, in measure 1 you can see that left is playing high notes and right is playing low notes. In measure 2, the roles switch and left is playing low while right plays high. It is not obligatory to follow that sort of pattern, but it is a simple rule of thumb to help you make beautiful music. Try this and see for yourself: If you played two notes that were straight across from each other – the painted middle G and the painted A for example – the harmony would not sound nearly as pleasing.
Another simple way to play two-note harmonies is to play two adjacent tines simultaneously. These are 3rd intervals, which always make pleasing harmonies. Basically, any single-note melody you can make can be harmonized by this method. Try adding the harmony note higher than (farther to the outside of) the melody note.
Real playing will often be complex, combining some of the different basic moves we have been studying here. The music in the tablature displays a combination of: playing two notes simultaneously on opposite sides; playing adjacent notes on one side; and playing alternating right-left-right segments. I would call this something totally new: a “two against three” pattern where left is playing two notes per measure while right is playing three notes per measure. A coherent sweeping motion is made by the thumbs in this example – first both thumbs sweep to the right, and then back to the left.

 Christmas in July 2025
 Patriotic and American Music for Kalimba